
Hello Tutorial
Hi there, how are you? Nice rainy weekend here, so I managed to get something done around the house. Even some sewing related things, which is probably surprising! Anyway.. today I wanted to talk about making the Hello Pillow.. I don't have a fancy pattern, but I have a download of the "hello" for you, and I think that's probably the part everyone is interested in!
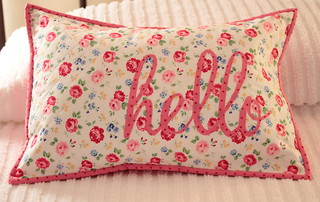
To get started my pillow form was a travel pillow from Target that is 14" x 20". It's a lot softer and squishier than my normal pillows and I think that it's because it's for sleeping, and not for being adorable in your pillow vault. (WHAT??!! You use your pillows and don't store them in a Pillow Repository? SHOCKING!) There's several sizes of rectangular pillow forms out there, and you can adjust the 'hello' for your size pillow. You don't have to use a rectangular pillow either! You can check out pillows on my Hello Pillow Pinterest Board to see all kinds of options.
So back to getting started, you cut your pillow front fabric the EXACT same size as your pillow form. This will give you a nice firm pillow. Next up, print this Hello PDF...the hello has already been reversed for tracing onto fusible web. Trace on to fusible web and fuse to your word fabric. Carefully cut it out and fuse it to the pillow fabric. I eye balled the placement then used a ruler to make sure it was straight on my fabric. It's about 3" from the bottom and 2 1/2" from the right hand side. I like the right justification here.
Fuse it and blanket stitch the edges. I love blanket stitching and could do it all day. But if you don' t have blanket stitching capabilities on your machine or you like straight stitching better, go for it.
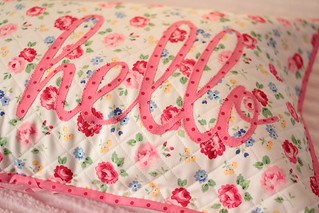
Next up, machine quilt the background. I outlined the letters then stitched a 1" grid. I love the texture. Plus, I think the three layers, top, batting and backing, make for a sturdier pillow.
Once that's done it's smooth sailing. For my 14" x 20" inch pillow front, I used two 14" x 24" pieces for the envelope back. I folded each piece in half so that it was 14" x 12" inches and basted them to the back with the folded edge in the center, overlapping to cover the pillow form. Then I used two pieces of 2 1/4" x width of fabric strips to make binding and bound the edge. Hand stitch and you have a pillow my friends.
Once that's done it's smooth sailing. For my 14" x 20" inch pillow front, I used two 14" x 24" pieces for the envelope back. I folded each piece in half so that it was 14" x 12" inches and basted them to the back with the folded edge in the center, overlapping to cover the pillow form. Then I used two pieces of 2 1/4" x width of fabric strips to make binding and bound the edge. Hand stitch and you have a pillow my friends.

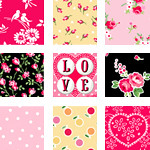
Now wouldn't a Love pillow be cute this week?
P. S. Elizabeth wrote a whole book about words on quilts and you can find it here!
posted by PamKittyMorning at 4:26 AM
![]()
![]()


.jpg)


11 Comments:
You already know how much I love your pillow but this morning what I'm really loving is that photo of Frankie holding it. Please tell me you took it because it's great and you're getting better! HELLO. So cute!
I adore this pillow! Will be making one now the tutorial is here, no excuses!
Such a cute young woman! and the pillow is adorable. Thanks for the tutorial, can you send my a few extra hours a day?
Love it!
Cute pillow! Thank you for info! I love that book - you sent me that way a while back! She has great instructions!!! Your Love idea for a pillow is great, too, for this week! ;O)
It really is darling. You explain it so well, even I could make one. Franky is so beautiful. The pillow and Frankie could be framed!
I am in LOVE with this pillow!!! Thanks so much for sharing the "hello"! I know what I'll be doing this weekend :) xoxo
Thanks so much for sharing your wonderful pillow tutorial. Already printed out and I will be off to Target to get a pillow!!!
So pretty! Thanks for sharing!! xo Heather
That pillow is SO cute, especially with Frankie holding it ;)
That is just tooooo stinkin' cute PKM -- I LOVE it! VERY VERY cute!!! Thanks for the hello template!
Post a Comment
<< Home